We are proud to describe ourselves as WordPress development experts and we also have years providing high end WordPress support and management. One issue that had become more and more prevalent was the problem with emails being sent from WordPress sites not getting delivered to the recipient.
We were seeing a large increase in failed delivery of emails that were being sent from WordPress sites, such as contact forms, orders, updates etc. Emails were being generated using the WP_mail() function and this, despite spf records being in place, were struggling to get through to recipients.
WP_mail() explained and why it struggles
The function wp_mail is essentially a script that allows sending of email via your WordPress site. Basic PHP allows for an email to be sent, but generally these emails can end up in spam folders, as the way PHP emails are generated is the same way spam emails are generated.
From a technical point of view, there were major issues as PHP mail does not support SMTP authentication, which is required by many mail servers.
The email delivery solution we introduced
In order to help with improving the deliverability of emails for WordPress, we have started to utilise Mailgun as our delivery solution of choice.
Mailgun is an email automation service provided by Rackspace. It offers a complete cloud-based email service for sending, receiving and tracking email sent through websites and applications. Basically, Mailgun takes care of sending your emails and incorporates email authentication and delivery techniques to greatly improve the deliverability rate.
There are a few reasons we recommend Mailgun. First, non-cloud server IP addresses can end up on spam blacklists. This can prevent your mail from making it to the recipient. Since the mail is coming from Mailgun, it is much more likely to reach the intended recipient. Additionally, by taking the burden of sending and receiving email off of our own servers, Mailgun can actually reduce the amount of computational power your application needs to be successful.
We are confident in its configuration and setup but have created a guide below on how to install and setup the Mailgun plugin on a WordPress site.
WordPress Mailgun Plugin Installation Instructions
First, make sure you have the Mailgun Plugin installed.
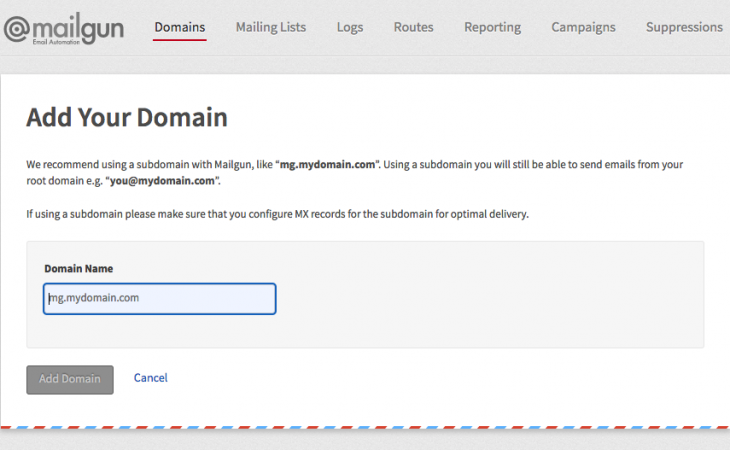
Visit the Mailgun site and login. There you will need to navigate to Domains > Add New Domain, and simply add the domain name of the site you wish to add Mailgun to.
Next you will need to navigate to where your DNS is hosted for the site and add two records:
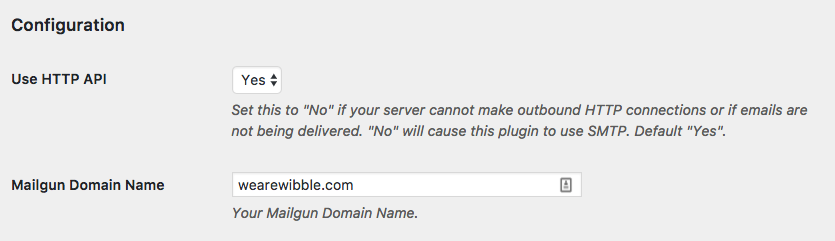
After the domain has verified, navigate to the WordPress setting for Mailgun
Here, we use the following:
- Use HTTP API > Yes
- Mailgun domain name: Your site domain name. e.g. wearewibble.com
- API Key : Enter your API Key provided by Mailgun
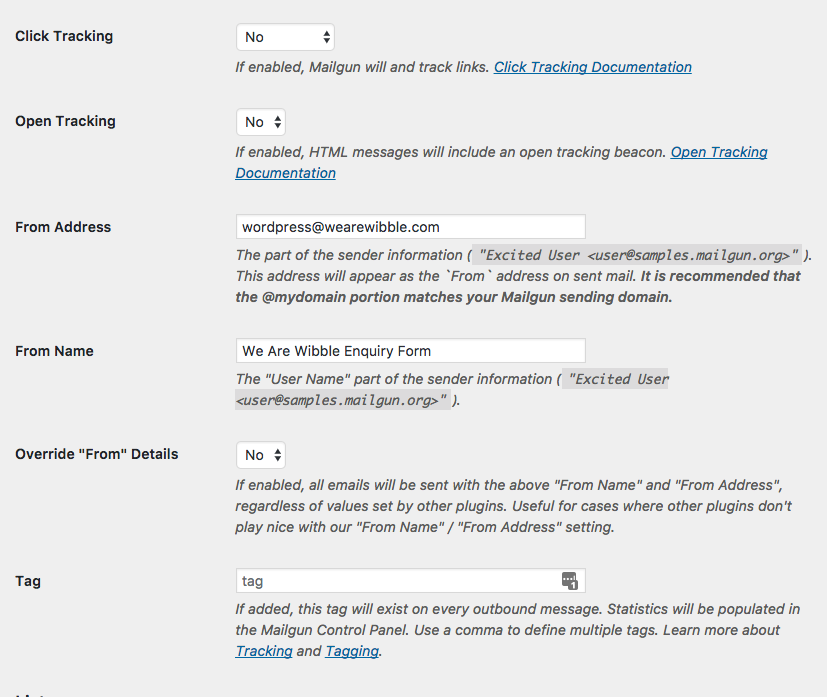
- Click Tracking: No
Note: It can be useful to use click tracking. This allows you to track if the email recipient clicked on a link in the email. If this information is not necessary, you can set this to No.
- Open Tracking: No
Note: It can be useful to use click tracking. This allows you to track if the email recipient opened the email and enabled image viewing. If this information is not necessary, you can set this to No.
- From Address : [email protected]
Note: This address will appear as the ‘From’ address on sent mail.
- From Name : Wibble Enquiry Form
Note: The username part of the sender information E.g. Wibble Enquiry Form <[email protected]>.
- Override “From” Details > Yes
Note: If enabled, all emails will be sent from the above “From Name” and “From Address”, regardless of values set by other plugins.
- Tag
Note: We don’t use any tags, but a tag added here will exist on every outbound message. Statistics will be populated in the Mailgun Control Panel.
If you filled out the fields above, you’re practically ready to go. All you need to do now is click Save Changes, and then click Test Configuration. This will let you know that everything is working ok.
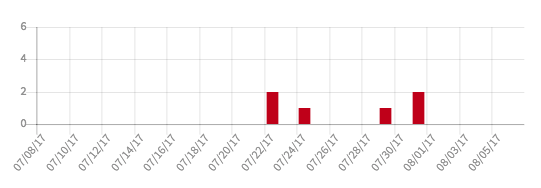
By using a service like Mailgun, you don’t have the hassle of handling email, and if there is an issue delivering an email, warnings and errors will show up in your Mailgun log, allowing you to see what the problem is and make plans on how to rectify the issue. On the other hand, if your using stand wp_mail or even PHP mail, you may have emails that don’t get delivered, and you would have no way of knowing when or why it’s happening.
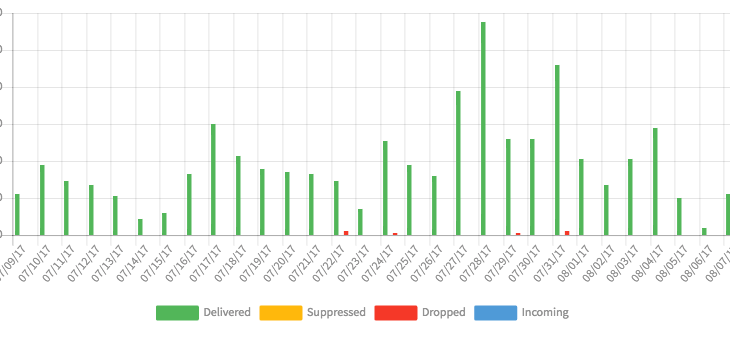
Above, you can see an example of a log, show all of the delivered emails in green, with the failed emails in red. Below is a chart of the failed emails. These can then be selected and the error can be inspected to find out what the issue was. Without using a service like Mailgun, none of this would be possible, and you most likely wouldn’t know that several emails had failed to deliver.