Recently at We Are Wibble, we have really pushed our web design capabilities with a huge concentration on concept prototyping and wireframing – driven by our latest Wibbler, Dean Anthony. In this blog post Dean Anthony introduces a tool we have been using for a while now – Adobe XD and highlights some of the advantages we’ve found and features that have made it a key asset in our web design and development workflow.
Introduction to Adobe XD
Adobe XD is a game changer in Web/UX design. It has made the process of sharing concepts with clients a breeze. From its beginnings as a basic wire framing tool mimicking a few basic features of Sketch until now were it benefits from features that make it one of the most promising of Adobe Creative Cloud’s applications. Whether you are a digital, web or UX designer and you have yet to dip into Experience Design. You should. If you are still using Photoshop for wireframes. Download XD immediately and rethink your life choices.
Here I will explain some of the basic prototyping features of Adobe XD and how to get your wireframes client ready with minimal fuss.
Prototyping
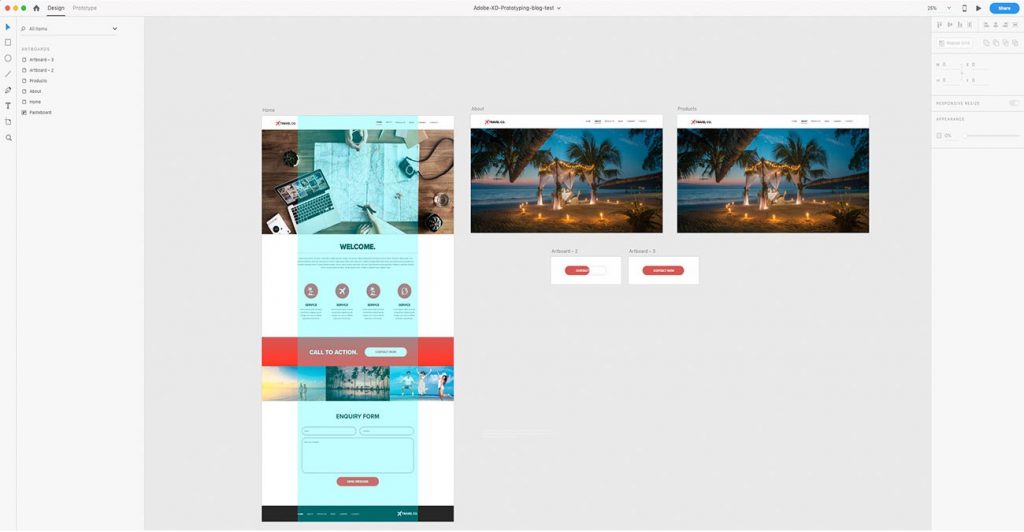
One of the best features of Adobe XD is prototyping. This allows you to share your designs with the client over a private or public link. It is similar to sharing an interactive PDF but without the file size or the needlessly complicated hotspot creation process.
Once you have a concept completed and the navigation ready as per your site map, you are ready to make your design come to life.
Before you begin linking your artboards together make sure you have named each artboard correctly. This will make it much easier to link each artboard with out having to go through names such as “artboard-1-final-final-new”. Once you’re happy with your naming convention you are ready to start prototyping.
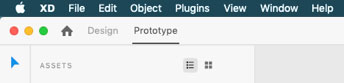
Switch between design and prototype modes with Adobe XD application
Firstly you will need to switch modes from ‘design’ to ‘prototype’. This is found in the top left of the application window(mac + pc). Simply click on ‘Prototype’ and you’re ready to go.
Linking Artboards
Set the homepage
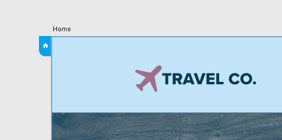
Start by selecting your homepage. To do this go to the edge of the first artboard. Click on the home icon and it will change to blue. You have now selected the homepage. Its is always a good idea to have a link back here on every artboard so make sure you make that clear on each lower page. Typically this is the website logo as is standard with most websites.
Linking to other Artboards
Next, start linking your navigation bar. This should provide a clear road map for every artboard on your website design. This is done by clicking on the navigation button or text. A blue arrow will appear on the text box, click on this to view the linking options. A dropdown showing the list of artboards can be seen here. Select the artboard you want to link to and click off the box into the paste area. Repeat this process until all the links are activated on the homepage.
The dropdown also provides options on how you want to link each page, you can experiment with different transitions, auto animations* and even using modal windows. These features are great for providing a dynamic prototype; great for showing off to clients.
Once you have completed the navigation on the home artboard simply copy the full Navigation and paste on every artboard. Make sure this is done within prototype mode. The links should still be active but it is worth checking. You will need to add the homepage link back and possibly the about page as XD auto corrects this when you paste a link on said pages. E.g. you can’t have an about page linking back to itself.
Hotspots or links highlighted for clients
Creating these links also creates a hotspot. These become visible when you click on an area of the artboard that is not linked. The hotspots appear as a light blue box for a few seconds to guide the user to the clickable area.
Auto Animate Transitions
Example of what can be achieve with auto animate
*Auto Animate is a new addition to Adobe XD. It allows for a more dynamic feel to your prototype and mimics effects that would be more at home on a mobile app/website. Unfortunately this feature is unavailable when sharing a prototype via a link. Instead these effects will revert to the more standard dissolve transition. Hopefully this will be updated soon as It would be a shame having such a great feature and not able to share it with clients.
Share your prototype for review
If you have a Creative cloud subscription or have paid for Adobe XD as a standalone application you will have the option to share your completed prototype as a URL. This is stored in your online Adobe XD account.
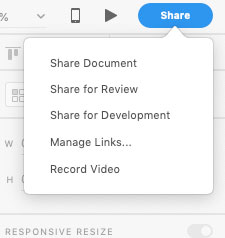
Simply click on the share button on the far right within the application window. You will be greeted with 5 options. For now, just worry about the Share for Review option.
From here you can name the prototype for the client. Options such as comments, open in full screen and show hotspot links are also here. By ticking ‘Allow Comments’ the client can give feedback within the link saving on email exchanges, this should be active as well as show hotspot links. I would refrain from clicking ‘Full-screen’ option as currently there isn’t a clear way to return to windowed mode on a browser. You can have a password, which isn’t a bad idea especially if you’re dealing with sensitive confidential material in your prototype.
Once you have selected your required options click ‘Create public link’. A progress bar will appear as the prototype is uploaded. Once finished a few icons will appear. You can view your link, share or copy to clipboards if you want to share with the client via email or whatsapp.
For now, click open in browser.**
**As previously stated Adobe are constantly updating Adobe XD with new features or refinements of previous features. Recently they have updated the share tab. Its pretty much the same but with options now to save it to the cloud and export the entire pasteboard for development. Sharing a Public or Private link remains unchanged – it’s just under the ‘Share for Review” menu item.
How to interact with Adobe XD prototype
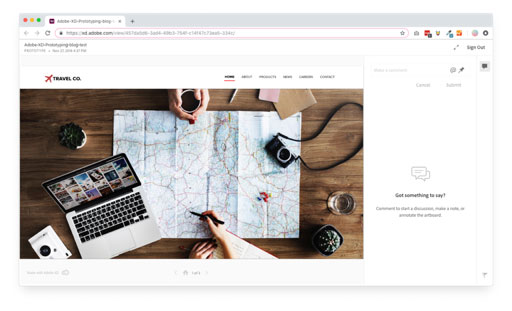
This is what the client will see, or anyone with access to the link. If you have password protected the prototype then you will be prompted to enter it before the page fully loads.
You have a few options here. Sign in/out of your CC account, full screen and make a comment. You can also interact with the prototype by clicking on the navigation bar you linked together within the application. Scroll through the prototype like a website or use the arrow keys to move left and right between the artboards. Using the arrows doesn’t always mean that the prototype will display in the right order. So for now let’s stick to using the navigation.
Making a Comment
Use the pins to comment on prototype
This is as much for the designer as it is the client. This handy tool lets you drag and drop pins onto the prototype to explain an element in more detail. A client who sees this only needs to click on the applicable number to highlight the comment on the artboard. They can also leave a comment and use the pin tool themselves as a means to leave feedback and suggest alterations.
Using the Navigation
Top navigation
If the navigation bar has been properly linked to the other artboards then this should work just like a navigation on an actual website. It is not always necessary to have a ‘HOME’ option in the navigation as most websites use the logo/ website name as a permalink back to a the homepage. For now I’ve kept it in as an example.
Scrolling through pages
Scroll using your mouse wheel or arrow keys
Depending on the height of the viewport you can usually scroll to see the rest to the artboard. This is is simply done by using the scroll wheel on your mouse or even the arrow keys on your keyboard
Removing links from managed links
All the prototype links you have created are stored in Adobe’s assets section online. You can find the link to this under the share button within the Adobe XD. Once clicked it will open in a browser window. From here you get a full view of all the links you have created previously. Options include either copying the link to share again or deleting the prototype link permanently. This won’t delete the actual XD file but it is a good way of cutting clients out of the development process and getting unnecessary feedback to slow you down. You can recreate these links at anytime by simply opening up Adobe XD and following the steps to share as above.
Summary
Adobe XD has made big strides since its introduction in 2016. What started as a very basic wire framing programme it has become an essential tool for this web studio. With regular updates adding new tools, features and ways to share prototypes, Adobe XD is becoming something very special.