In this post we are looking at some research we did into how to improve our development set up and make the process for developing WordPress sites better. Adam has put together a guide on how to set it and configure so you can quickly spin up a WordPress site.
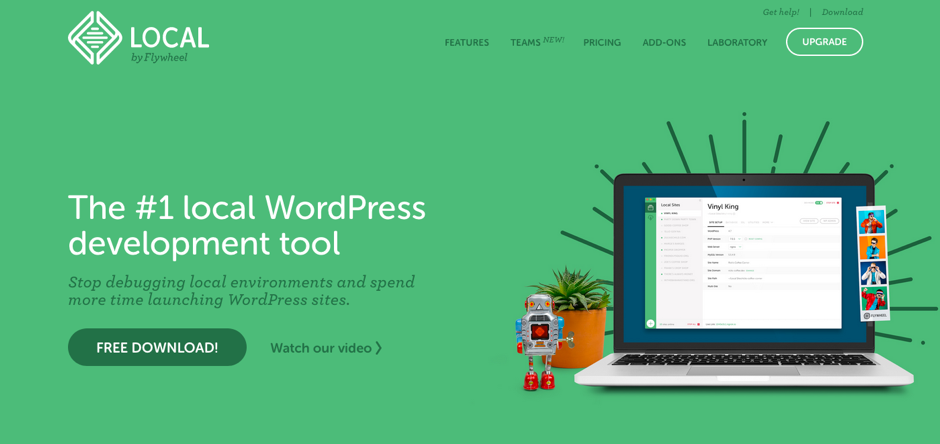
Local by Flywheel has become the number 1 local WordPress development tool by removing the time needed to install WordPress to pre-existing localhost development tools, giving the developer more time to launch WordPress sites. Local has tons of free features to use, like SSL protection of local sites with the ability to change your local domain name, hot-swapping environments from different versions of PHP, MySQL and web servers (Appache, Nginx), and with the ability to install add-ons to further improve your sites local development (list of full features).
Here at Wibble we use WordPress for all our web design and development projects, so a tool like Local really improves workflow when creating development sites for our clients. Here I will be showing you how to set up your own local WordPress site with Local, and install extensions to improve your workflow.
Setting up a WordPress site with Local by Flywheel
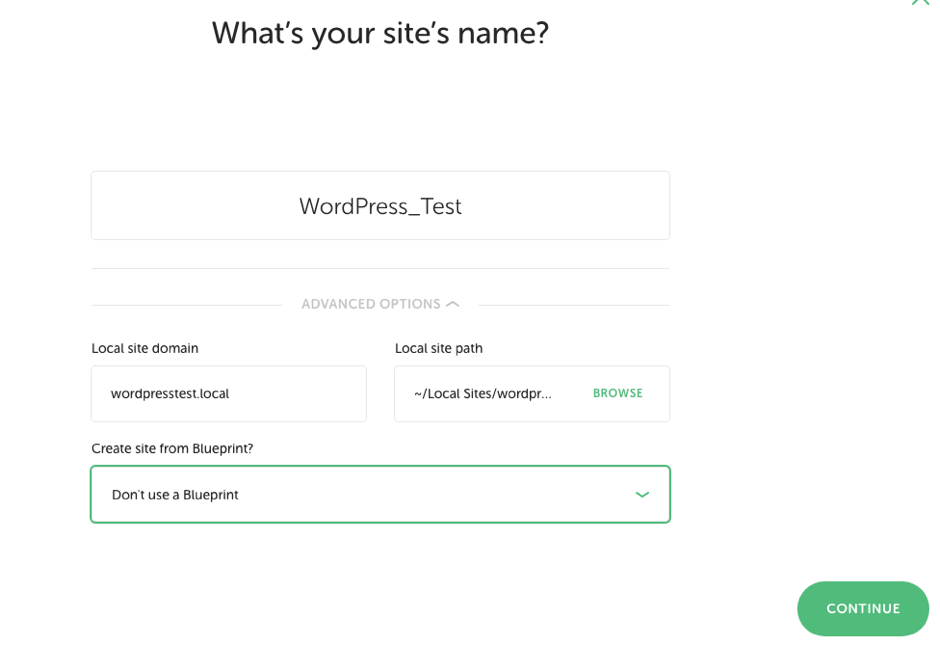
3. Create a name for your site, this will be saved in a folder called Local Sites on your computer. You can change the directory or domain by clicking “advanced options”.
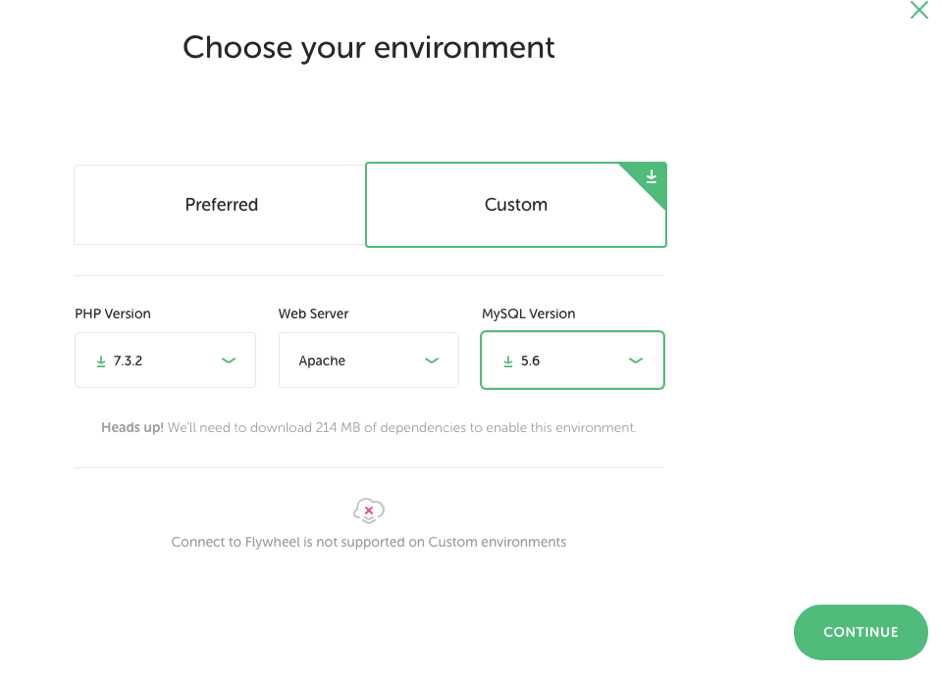
4. You then choose your environment, for most cases just select preferred as it is the default, but in this example we will choose custom to allow us to setup our extensions.
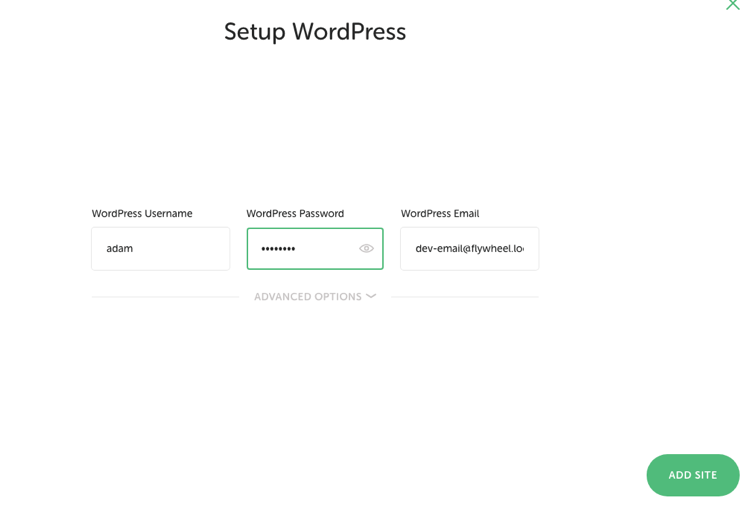
5. Now create your WordPress login and click “add site”, this will create your site files in your chosen directory.
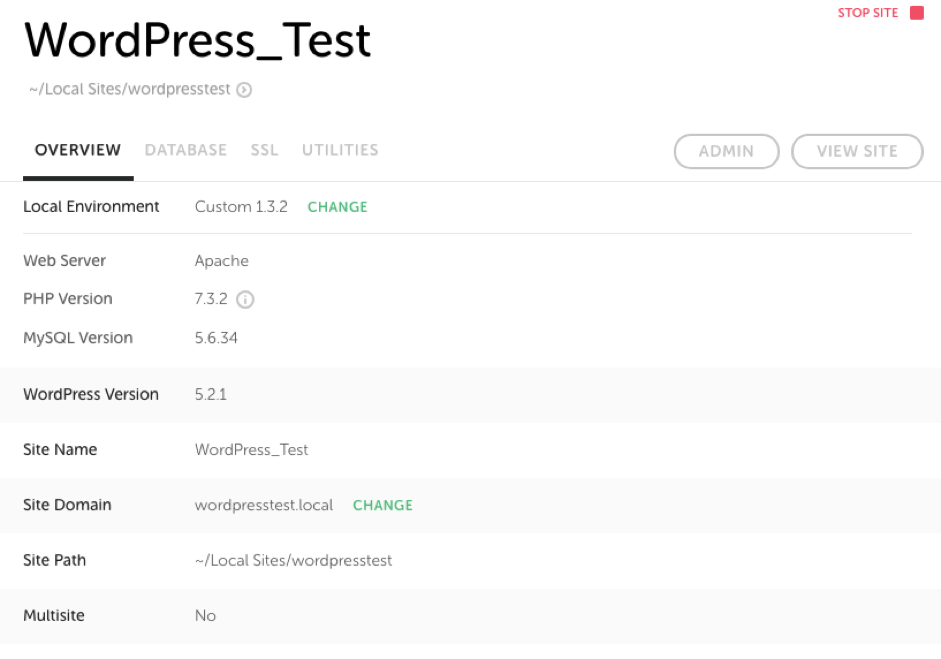
6. From your dashboard you can view the site by clicking “view site” or enter your WordPress dashboard by clicking “admin”.
7. You can access the sites database by navigating to the database tab on the Local dashboard and clicking “adminer”.
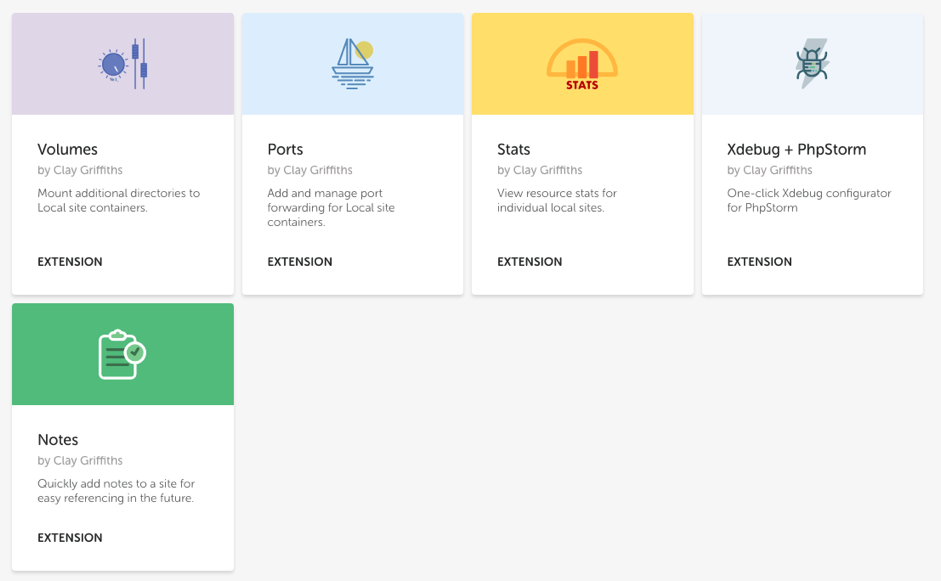
8. To further improve your development using Local, you can add extensions. Navigate on the left sidebar to extensions. From here you will see all the available extensions for install.