Sometimes as a web design& developmentstudio, we are required to step out of the box.
This is a walkthrough for setting up an Apache2 server on Ubuntu to host a WordPress site. I will cover the installation and configuration of Apache, MySQL (MariaDB), PHP, WP-CLI, and SSL certificates, as well as some optional steps for setting up a WordPress site.
We were brought in to set up a third party’s server with a specific config. There was limited / poor documentation on the setup with specifics in WordPress so we decided to set up our own guide for other web developers or web agencies that would need to set up an Apache2 Server for WordPress.
Initial web server setup
Before we begin, it’s important to ensure your system is up-to-date. Run the following commands from your server’s home directory (/var/www/html) with sudo privileges:sudo apt update && apt upgrade
sudo apt update && apt upgrade
sudo apt update: This command refreshes the package lists, ensuring you have the latest information about available software.
sudo apt upgrade: This command upgrades all currently installed packages to their newest versions.
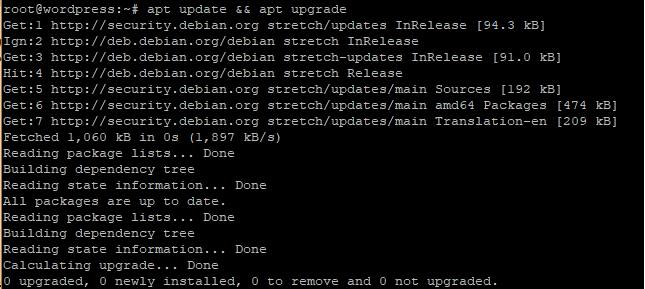
You should see this output:
Step 1: Install Apache
Apache is the web server software we’ll use. To install it, use the following command:
sudo apt install apache2
sudo apt install apache2 Installs the Apache2 web server package.
You should see this output:
To verify that Apache is installed and running, run:
systemctl status apache2
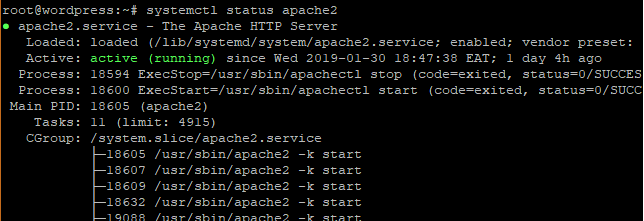
systemctl status apache2 checks the status of the Apache2 service, showing whether it’s active and running.
You should see this output:
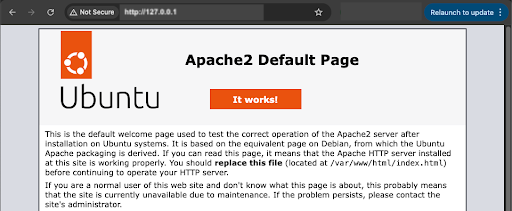
You can further verify by opening a web browser and navigating to your server’s IP address. If Apache is installed correctly, you’ll see the default Apache welcome page eg:
Step 2: Install MySQL (MariaDB)
We’ll use MariaDB, an open-source fork of MySQL, as our database engine. Install it with:
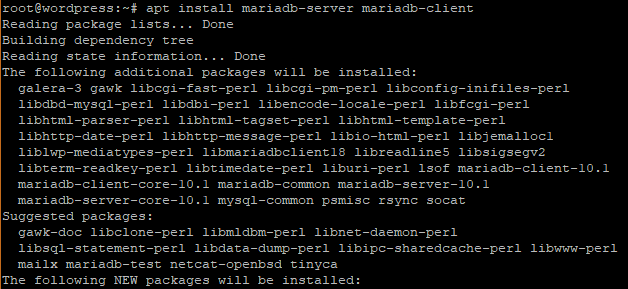
sudo apt install mariadb-server mariadb-client
This installs the MariaDB server and client packages.
Next, secure your MariaDB installation by running:
mysql_secure_installation
This command will prompt you to set a root password, remove anonymous users, disallow remote root login, remove the test database, and reload privileges. Answer these prompts according to your security preferences.
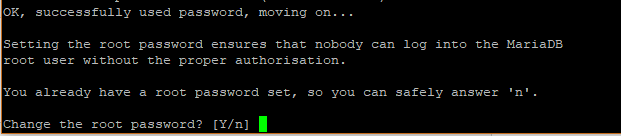
The first step will prompt you to change the root password to login to the database. You can opt to change it or skip if you are convinced that you have a strong password. To skip changing type n.
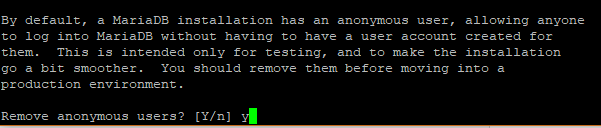
For safety’s sake, you will be prompted to remove anonymous users. Type Y.
Next, disallow remote root login to prevent hackers from accessing your database. However, for testing purposes, you may want to allow log in remotely (optional) if you are configuring a virtual server. Type Y.
Next, remove the test database. Type Y.
Finally, reload the database to apply the changes. Type Y.
Step 3: Create WordPress Database
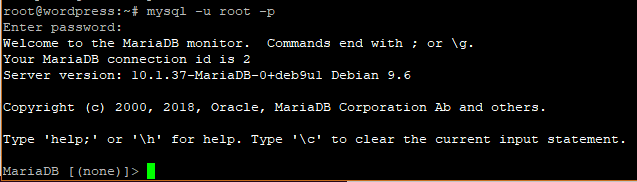
Now it’s time to log in to our MariaDB database as root and create a database for accommodating our WordPress data.
sudo mysql -u root -p
Output:
Create a database for our WordPress installation. Change wordpress_db to name of site i.e. dbexamplesite
CREATE DATABASE wordpress_db;
Output:
Next, create a database user for our WordPress setup. Change wp_user to the name you’d like. Change wp_user to the username for this database, change password to your password:
CREATE USER 'wp_user'@'localhost' IDENTIFIED BY 'password';
Output:
Grant privileges to the user Next, grant the user permissions to access the database:
GRANT ALL ON wordpress_db.* TO 'wp_user'@'localhost' IDENTIFIED BY 'password';
Output
Great, now you can exit the database:
FLUSH PRIVILEGES;
Exit;
Step 4: Install PHP
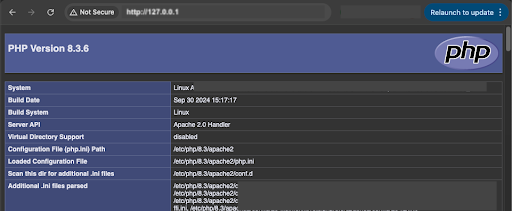
PHP is required for WordPress to function. Install it along with the MySQL extension:
sudo chmod +x wp-cli.phar: Makes the WP-CLI file executable. sudo mv wp-cli.phar /usr/local/bin/wp: Moves the file to a directory in your PATH, allowing you to run it using the wp command.
Test the installation
wp --info
Set file permissions if you are not a root user on the server but do have sudo access as you may need to have this for file updates via SFTP:
sudo chmod -R 777 /var/www/html
sudo chmod -R 777 /var/www/html: Sets full read, write, and execute permissions to the /var/www/html directory and all its contents. This is a broad permission and should be used cautiously, preferably only in the setup and is inaccessible to public internet, it’s generally recommended to set more restrictive permissions once you have all the files you need in place and for WordPress that is 644 for files and 755 for directories.
Create a site folder:
sudo mkdir example.com
Navigate to the new directory and download WordPress:
cd example.com
then:
wp core download
Step 6: Install SSL Certs / HTTPS
To enable HTTPS, you’ll need an SSL certificate. You can use the default snake-oil cert for dev only, generate a self-signed SSL certificate for testing or use Let’s Encrypt for free, production-ready certificates. For self-signed:
wp search-replace <old> <new> –dry-run: Performs a search-replace of URLs in the database, with –dry-run showing the changes without applying them. Remove –dry-run to apply the changes.
Copy the wp-content folder from your existing site to your new server using FileZilla or similar.
Step D: Apache Virtual Settings to allow DNS pointing
Edit the Apache configuration files to point to your new site directory:sudo vi /etc/apache2/sites-available/000-default.conf
sudo vi /etc/apache2/sites-available/default-ssl.conf
Update the DocumentRoot to /var/www/html/example.com and add <Directory> directives.
Checking DNS Resolution
Verify DNS resolution by checking these files for the correct site root path and domain:
sudo vi /etc/apache2/sites-available/000-default.conf sudo vi /etc/apache2/sites-available/default-ssl.conf sudo vi /etc/hosts sudo vi /etc/apache2/apache2.conf sudo vi /var/www/html/example.com/.htaccess sudo vi /var/www/html/example.com/wp-config.php
Remember to adjust commands and configurations to fit your specific environment.
fully managed WordPress hosting and support
Wibble are known as the go-to agency on the Island of Ireland for all things WordPress: from management and development to support and hosting. We like to see ourselves as the best WordPress web design agency there is. Our Google reviews back this up and we are proud that so many of our web design clients refer us to their peers.
This blog post gives a brief demonstration into the level of expertise that we possess around everything to do with WordPress and fully managed WordPress hosting.
contact wibble web design
If your current host isn’t cutting it in terms of fully managed WordPress support and hosting, contact us to see can we help look after your exisitng WordPress site or help you set up a new web server for a new project.